ATTENTION: Leaky Tank Owner

Waterproof Your Water Tank with Liquid Rubber DIY Bundle.

All-in-One Bundle to Seal Cracks & Leaks.

Save on costly repairs and expand the Life of your Water Tank!

💦 Potable Water Certified

  • 10 YEAR WARRANTY

  • ECO - FRIENDLY

  • BEST - PRICES

  • SAVE MONEY

Stretches Up to 1800%

Cracks and Leaks Don’t Stand a Chance!

Unbeatable durability and longevity.

1800% elongation and 95% recovery - it resists cracking and aging.

Apply easily by Brush, Roller or Spray Machine

Easy Application, Simple Solutions.

No Specialist Skills Required for Success.

water_tank_with_cracks
Step 1:
Clean the Tank
  • Empty and thoroughly clean the tank. For best results, use a pressure washer.
geo_textile_applied_over_water_tank_cracks
Step 2:
Reinforce the Cracks with GEO Textile
  • Apply Geo Textile between two layers of Liquid Rubber Sealant over the cracks:
    Rubber -> Geo Textile -> Rubber
waterproof_sealant_applied_in_water_tank
Step 3:
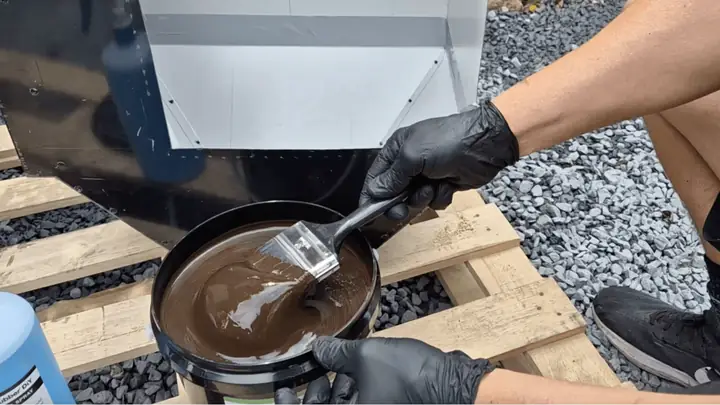
Apply Liquid Rubber Waterproof Sealant
  • Apply up to 2 thick coats of Liquid Rubber to the tank’s walls and floor using a brush, roller, or spray machine.

Watch the 3-Minute Video to See How It’s Done!

Choose Your Bundle.

Don't wait until it's too late !

Product Carousel

Easy-To-Apply Kit.

Includes all essential products tailored For Your Water Tank Project

Product Carousel

See What Our Customers Are Saying
About Our Liquid Rubber.

STILL NOT SURE?

Frequently Asked Questions.

1: How do I prepare my tank for waterproofing?

Empty the tank and clean it thoroughly. Remove any debris, rust, or old coatings. Use a pressure washer for the best results.

2: How many coats of liquid rubber sealant do I need?

Apply up to 2 thick coats for optimal protection. Ensure each coat dries completely before applying the next.

3: Can I use the sealant on any type of tank material?

Yes, the sealant can be used on various materials like concrete, metal, and plastic. Ensure the surface is clean and dry.

4: How long does it take for the sealant to dry and cure?

Before filling tank back up with water, Waterproof Sealant must be cured 7-10 days minimum - longer during cold weather

5: What should I do if I notice leaks after application?

Inspect the area for missed spots or application errors. Clean and reapply sealant as needed, ensuring it adheres properly.

6: What tools or equipment are needed for the application?

To clean the tank, you’ll need a pressure washer and tools to remove old sealants or debris. For applying the sealant, use a brush, roller (included in the bundle), or spray machine. Don’t forget protective gear like gloves and a mask. A ladder may also be necessary for hard-to-reach areas and to access the tank.

7: Can I apply the sealant in different weather conditions?

Ideal conditions are dry and mild weather. Avoid applying in heavy rain or extremely cold temperatures, as this can affect curing.

8: What safety precautions should I take during application?

Wear protective gloves, eyewear, and a mask to avoid inhaling fumes or coming into contact with the sealant.

Ensure proper ventilation in the area.

9: Is the sealant suitable for potable water tanks?

Yes, the sealant is certified for use with potable water tanks and is safe for drinking water.

10: Shipping & Returns

We ship our Products throughout Australia and New Zealand.

FREE SHIPPING APPLIED TO ALL ORDERS WITHIN AUSTRALIA

Expected shipment duration:
3 - 8 Business Days within Australia and 6 - 26 Days on New Zealand orders.


You can select "Pick-Up" at Checkout.


Pick-Up Address:

1 Conway Court,

4211 Nerang, QLD

For larger orders, please contact us at [email protected]

Contact:

✆ 1300 257 349

Email: [email protected]

Address: 1 Conway Ct, Nerang, QLD, 4211, Australia

Copyrights 2024 | Liquid Rubber DIY | Terms & Conditions Privacy Policy

This site is not a part of the FACEBOOK Website or FACEBOOK Inc. Additionaly. This site is NOT endorsed by FACEBOOK is a trademark of FACEBOOK, Inc.

Order Notification Widget
Order Bundle